Task 2: Produce a
personalised online Blog.
Publish an online blog to evaluate your work describing the
following:
o
Your understanding of the principles of viewpoint,
studio and natural lighting, backgrounds, composition and choice of focal
length lenses.
o
Your understanding or CCD quality and
sensitivity settings and how you have creatively utilised those settings in
your photographs.
o
How you have utilised advance photo editing
software techniques to modify and manipulate images and produced black and
white and colour photographs.
o
How you have demonstrated personal qualities of
enquiry and expression in the production of your photographs.
o
Provide evidence of Health and safety procedures
appropriate to equipment and materials used and location.
Advanced Photography techniques
My understanding of
- Principle of view point
- Studio and natural Lighting
- Back grounds
- Composition
- Choice of Focal length
Principle of View Point
In this article I’d like to consider the POINT OF VIEW. we also know it as the photographer’s perspective, vantage point or, simply, where you are standing at the time of taking the photo.
Height Perspective in photography
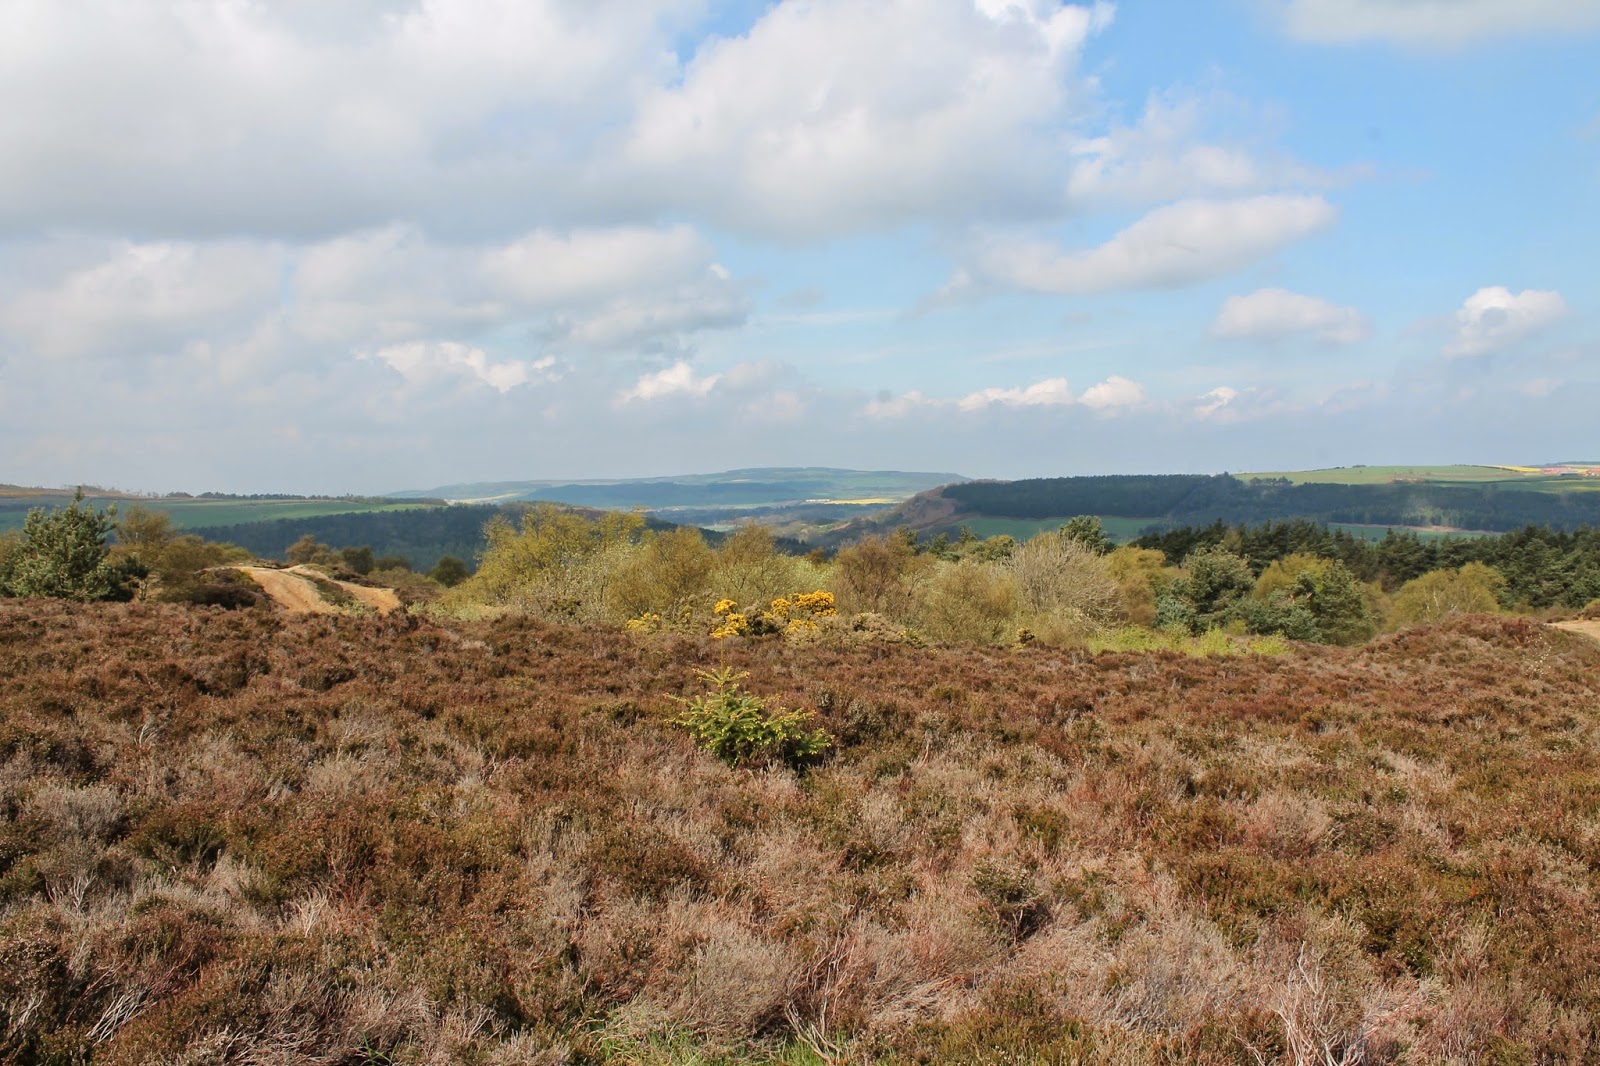
The place where the base of an object is located on the ground in an image is a clue to its distance from the camera viewpoint. In a landscape scene the ground or ground plane rises toward the horizon. The higher up in the ground area of the picture (up to the horizon) the base of an object is located, the further away it seems from the viewpoint and the greater its height perspective.

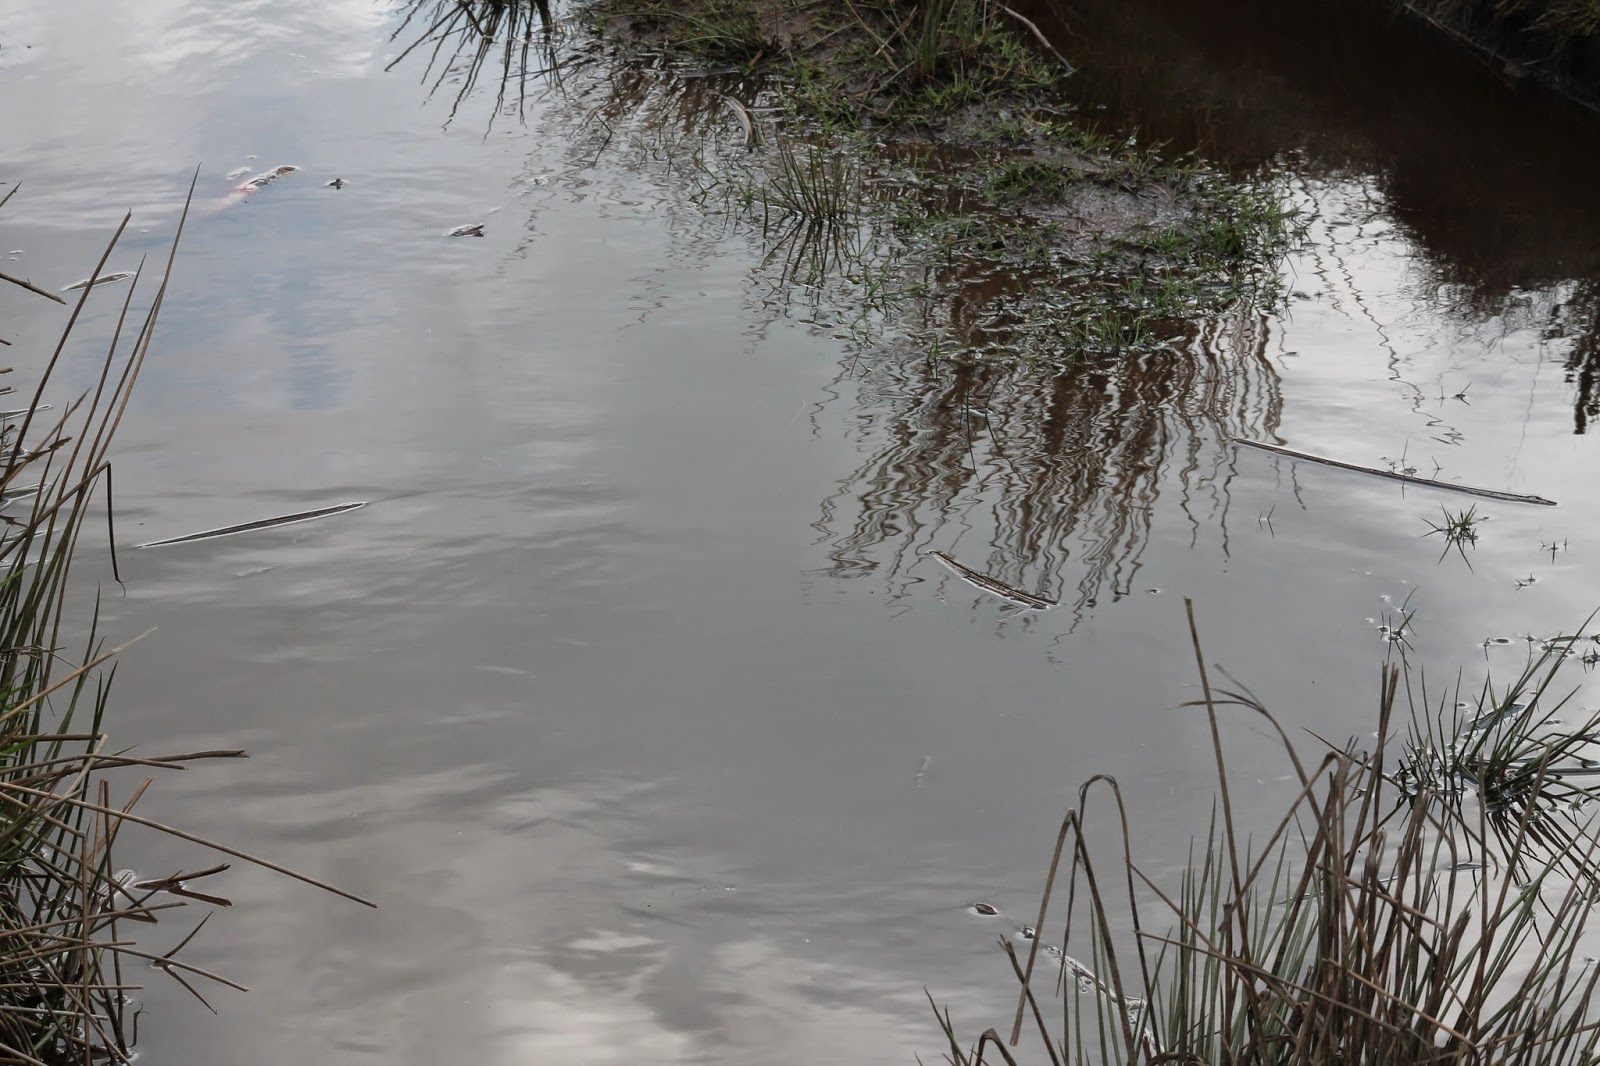
In this picture the range of distance that appears to be acceptably sharp from front to back. therefore, it still adding a communication value to the picture. this a good example forDepth of Field. (DOP)


Back grounds
Aperture is one of the three pillars of photography, the other two being ISO and Shutter Speed. Without a doubt, it is the most talked about subject, because aperture either adds a dimension to a photograph by blurring the background, or magically brings everything in focus. In this article, I will try to explain everything I know about aperture in very simple language.
this picture taken by me using Phone 5 and it was takennfrom a high point. my main view point was children and blue bells added an extra advantage for the picture. exposure was 1/985 seconds. in this picture images are clear because the aperture value is not high. ( AV) According to my knowledge the size of the aperture has a direct impact on the depth field which is the area of the image that appears sharp A large number such as f32, (which means a smaller aperture ) will bring all foreground and back ground objects in focus. Small f - number will isolate the foreground from the background by making the foreground objects sharp and the background blurry.
when i used the IPhone it automaticaly opend for a smaller aperture and background and the foregrounds are very clear.
in these picture back ground is not in focus. but the object is focused.


Height Perspective in photography

The place where the base of an object is located on the ground in an image is a clue to its distance from the camera viewpoint. In a landscape scene the ground or ground plane rises toward the horizon. The higher up in the ground area of the picture (up to the horizon) the base of an object is located, the further away it seems from the viewpoint and the greater its height perspective


Pictures from natural Light and Stdio LightNatural light _


Pictures taken in Studio Light


Taking pictures in natural lights using different aperture values and considering about ISO and Shutter speed.


What is Aperture?
 Simply put, aperture is a hole within a lens, through which light travels into the camera body. It is easier to understand the concept if you just think about our eyes. Every camera that we know of today is designed like human eyes. The cornea in our eyes is like the front element of a lens – it gathers all external light, then bends it and passes it to the iris. Depending on the amount of light, the iris can either expand or shrink, controlling the size of the pupil, which is a hole that lets the light pass further into the eye. The pupil is essentially what we refer to as aperture in photography. The amount of light that enters the retina (which works just like the camera sensor), is limited to the size of the pupil – the larger the pupil, the more light enters the retina.
So, the easiest way to remember aperture, is by associating it with your pupil. Large pupil size equals large aperture, while small pupil size equals small aperture. The iris of the lens that controls the size (diameter) of the aperture is called “diaphragm” in optics. The sole purpose of the diaphragm is to block or stop all light, with the exception of the light that goes through the aperture. In photography, aperture is expressed in f-numbers (for example f/5.6). These f-numbers that are known as “f-stops” are a way of describing the size of the aperture, or how open or closed the aperture is. A smaller f-stop means a larger aperture, while a larger f-stop means a smaller aperture. Most people find this awkward, since we are used to having larger numbers represent larger values, but not in this case. For example, f/1.4 is larger than f/2.0 and much larger than f/8.0.
Take a look at this chart
Take a look at this chart
Perspective in photography is a very important composition technique
What is Depth of Field?
One important thing to remember here, the size of the aperture has a direct impact on the depth of field, which is the area of the image that appears sharp. A large f-number such as f/32, (which means a smaller aperture) will bring all foreground and background objects in focus, while a small f-number such as f/1.4 will isolate the foreground from the background by making the foreground objects sharp and the background blurry.
Image on left shot at f/2.8, Image on right shot at f/8.0As you can see, just changing the aperture from f/2.8 to f/8.0 has a big effect on how much of WALL-E is in focus and how visible the background gets. If I had used a much smaller aperture such as f/32 in this shot, the background would be as visible as WALL-E.Another example:
Mailboxes - Aperture set to f/2.8In the above example, due to the shallow depth of field, only the word “Cougar” appears sharp, while everything else in the front and behind of that word is blurred. If I had used a larger aperture such as f/1.4 and focused on one of the letters, probably only that letter would have been sharp, while everything else would have been blurred out. The larger the aperture, the smaller the area in focus (depth of field).4) Lens Apertures: Maximum and Minimum
Every lens has a limit on how large or how small the aperture can get. If you take a look at the specifications of your lens, it should say what the maximum (lowest f-number) and minimum apertures (highest f-number) of your lens are. The maximum aperture of the lens is much more important than the minimum, because it shows the speed of the lens. A lens that has an aperture of f/1.2 or f/1.4 as the maximum aperture is considered to be a fast lens, because it can pass through more light than, for example, a lens with a maximum aperture of f/4.0. That’s why lenses with large apertures are better suited for low light photography.The minimum aperture is not that important, because almost all modern lenses can provide at least f/16 as the minimum aperture, which is typically more than enough for everyday photography needs.
This 50mm lens has a max. aperture of f/1.4There are two types of lenses: “fixed” (also known as “prime”) and “zoom”. While zoom lenses give you the flexibility to zoom in and out (most point and shoot cameras have zoom lenses) without having to move closer or away from the subject, fixed or prime lenses only have one focal length. Due to the complexity of optical design for zoom lenses, many of the consumer lenses have variable apertures. What it means, is that when you are fully zoomed out, the aperture is one number, while zooming in will increase the f-number to a higher number. For example, the Nikon 18-200mm lens has a variable maximum aperture of f/3.5-f/5.6. When zoomed fully out at 18mm, the lens has an aperture of f/3.5, while when fully zoomed in at 200mm, the lens has an aperture of f/5.6. The heavy, professional zoom lenses, on the other hand, typically have fixed apertures. For example, the Nikon 70-200mm f/2.8 lens has the same maximum aperture of f/2.8 at all focal lengths between 70mm and 200mm.Why is this important? Because larger maximum aperture means that the lens can pass through more light, and hence, your camera can capture images faster in low-light situations. Having a larger maximum aperture also means better ability to isolate subjects from the background.If you have any questions, comments or feedback, please post them in the comments section below.
How can we show depth and distance in our mages?
Linear Perspective in photography
Converging parallel lines that move away from us appear to converge at the horizon. Sides of roads and the rails of railroads seem to merge together at extreme distance. This is an aspect of the relative size effect. Even though the sides of the roads or the rails are at a fixed distance they will appear smaller and smaller as they get further away from us.
When you zoom with a lens but keep the distance from the lens to the subject the same, there will be no change in the perspective. The zooming will only change the size of the subjects in the frame.
By using the right combination of distance to the subject as well as the lens focal length, a photographer can create an image that looks deep or shallow. The feeling of depth or shallowness is only an illusion, but it is a very important compositional factor.
Height Perspective in photography
The place where the base of an object is located on the ground in an image is a clue to its distance from the camera viewpoint. In a landscape scene the ground or ground plane rises toward the horizon. The higher up in the ground area of the picture (up to the horizon) the base of an object is located, the further away it seems from the viewpoint and the greater its height perspective.
Overlap Perspective in photography
Another way of showing distance in an image is to use overlap perspective. When subjects within the image are on about the same line of sight, those objects closer to the camera overlap more distant objects and partially hide them. It is obvious to the viewer that the partially obstructed objects are behind the unobstructed objects. If these overlaps are repeated within the image, they give the viewer a sense of depth and a perception of the relative distance of the objects.
Introducing ISO sensitivity
The ISO sensitivity (ISO rating, ISO speed) characterizes the sensor or film sensitivity to light. Formerly called ASA rating, digital cameras continue to use the same system introduced a long time ago. It is common to use the term "stop" in photography. One stop in terms of ISO refers to a doubling of our sensitivity. ISO 200 is twice as sensitive as ISO 100 and is therefore "one stop higher." In film photography, we would have to make a decision on the type of film needed before going out on a shoot. One of the great advantages of digital photography is the capability to change the ISO settings for each frame.
Use higher ISO settings with caution. High ISO film is wonderful for low light photography, but they have much more grain then low ISO films. A high ISO setting on your digital camera will also produce more noise in your image.
Modern SLR cameras have very low noise and I would not hesitate to use even higher ISO settings to "get the shot." Digital SLR cameras have less noise than point and shoot cameras at the same ISO setting, since their larger sensor means they are more light sensitive (a large window lets in more light than a small one).
Shutter Speed
The shutter is covering the film or sensor and only when the shutter-release is pressed, do we open the shutter for a pre-determined time to let light pass through our lens to the sensor. We also use "stops" to measure shutter speeds. Each stop doubles the time the shutter remains open and thus doubles the light sensitivity of our camera (e.g. 1/160s is twice as long as 1/320s). For handheld shooting, we require at least 1/(focal length) or shorter to avoid camera shake (if no Image Stabilization is used). For a Rebel XSi with 50mm lens, this means 1/80s or longer (the rebel has a focal length multiplier of 1.6, so 50x1.6=80).
Aperture
The aperture is the size of your lens opening. It controls how much light we let pass to our sensor. Aperture also determines Depth of Field and is measured in stops (f-stops for aperture). Each stop doubles the amount of light we let pass (f/4 is two stops larger then f/8).
Aerial perspective in photography
The farther away from the camera subjects are, the less distinct they become. This is because the air affects the light as it travels from subject to camera sensor. Dust particles and water droplets in the air diffract the light and make the image hazy with lack of contrast. This effect is known as aerial perspective and can be used to make an image seem more three dimensional. How marked the effect is on the image is dependent on the distance.
Aerial perspective is more useful when shooting landscapes rather than portraits, but the effect can be seen in any picture where the background is far enough away from the camera. In landscape photography this effect is more distinct in the afternoon when the air has been heated during the day. If you want to avoid the effect in landscape images, shooting at sunrise is recommended.
Rule of Thirds
Imagine that your image is divided into 9 equal segments by 2 vertical and 2 horizontal lines. Therule of thirds says that you should position the most important elements in your scene along these lines, or at the points where they intersect.Doing so will add balance and interest to your photo. Some cameras even offer an option to superimpose a rule of thirds grid over the LCD screen, making it even easier to use.Notice how the building and horizon are aligned along rule-of-thirds lines. Image by Trey Ratcliff.Balancing Elements
Placing your main subject off-centre, as with the rule of thirds, creates a more interesting photo, but it can leave a void in the scene which can make it feel empty. You should balance the "weight" of your subject by including another object of lesser importance to fill the space.Here, the visual "weight" of the road sign is balanced by the building on the other side of the shot. Image by Shannon Kokoska.Leading Lines
When we look at a photo our eye is naturally drawn along lines. By thinking about how you place lines in your composition, you can affect the way we view the image, pulling us into the picture, towards the subject, or on a journey "through" the scene. There are many different types of line - straight, diagonal, curvy, zigzag, radial etc - and each can be used to enhance our photo's composition.The road in this photo draws your eye through the scene. Image by Pierre Metivier.Symmetry and Patterns
We are surrounded by symmetry and patterns, both natural and man-made., They can make for very eye-catching compositions, particularly in situations where they are not expected. Another great way to use them is to break the symmetry or pattern in some way, introducing tension and a focal point to the scene.The symmetry of this chapel is broken by the bucket in the bottom right corner. Image by ViewpointBefore photographing your subject, take time to think about where you will shoot it from. Our viewpoint has a massive impact on the composition of our photo, and as a result it can greatly affect the message that the shot conveys. Rather than just shooting from eye level, consider photographing from high above, down at ground level, from the side, from the back, from a long way away, from very close up, and so on.The unusual viewpoint chosen here creates an intriguing and slightly abstract photo. Image byronsho.Background
How many times have you taken what you thought would be a great shot, only to find that the final image lacks impact because the subject blends into a busy background? The human eye is excellent at distinguishing between different elements in a scene, whereas a camera has a tendency to flatten the foreground and background, and this can often ruin an otherwise great photo. Thankfully this problem is usually easy to overcome at the time of shooting - look around for a plain and unobtrusive background and compose your shot so that it doesn't distract or detract from the subject.The plain background in this composition ensures nothing distracts from the subject. Image byPhilipp Naderer.Depth
Because photography is a two-dimensional medium, we have to choose our composition carefully to conveys the sense of depth that was present in the actual scene. You can create depth in a photo by including objects in the foreground, middle ground and background. Another useful composition technique is overlapping, where you deliberately partially obscure one object with another. The human eye naturally recognises these layers and mentally separates them out, creating an image with more depth.Emphasise your scene's depth by including interesting subjects at varying distances from the camera. Image by Jule Berlin.Framing
The world is full of objects which make perfect natural frames, such as trees, archways and holes. By placing these around the edge of the composition you help to isolate the main subject from the outside world. The result is a more focused image which draws your eye naturally to the main point of interest.Here, the surrounding hills form a natural frame, and the piece of wood provides a focal point. Image by Sally Crossthwaite.Cropping
Often a photo will lack impact because the main subject is so small it becomes lost among the clutter of its surroundings. By cropping tight around the subject you eliminate the background "noise", ensuring the subject gets the viewer's undivided attention.Cut out all unnecessary details to keep keep the viewer's attention focused on the subject. Image by Hien Nguyen.Experimentation
With the dawn of the digital age in photography we no longer have to worry about film processing costs or running out of shots. As a result, experimenting with our photos' composition has become a real possibility; we can fire off tons of shots and delete the unwanted ones later at absolutely no extra cost. Take advantage of this fact and experiment with your composition - you never know whether an idea will work until you try it.Digital photography allows us to experiment with different compositions until we find the perfect one. Image by Jule Berlin.Composition in photography is far from a science, and as a result all of the "rules" above should be taken with a pinch of salt. If they don't work in your scene, ignore them; if you find a great composition that contradicts them, then go ahead and shoot it anyway. But they can often prove to be spot on, and are worth at least considering whenever you are out and about with your camera.
Understanding Focal Length
Focal length, usually represented in millimeters (mm), is the basic description of a photographic lens. It is not a measurement of the actual length of a lens, but a calculation of an optical distance from the point where light rays converge to form a sharp image of an object to the digital sensor or 35mm film at the focal plane in the camera. The focal length of a lens is determined when the lens is focused at infinity.The focal length tells us the angle of view—how much of the scene will be captured—and the magnification—how large individual elements will be. The longer the focal length, the narrower the angle of view and the higher the magnification. The shorter the focal length, the wider the angle of view and the lower the magnification.Zoom or Prime
There are two types of lenses-prime and zoom. Prime lenses have a fixed focal length and zoom lenses have variable focal lengths. The advantage of the zoom lens is its versatility. They are ideal when you are photographing a variety of subjects such as landscapes and portraits, and you just want one lens for both situations. Using a zoom lens also reduces the number of times you need to change the lens which saves time and limits the possibility of getting dust in the camera's mirror box or on the sensor.The main advantages of prime or fixed focal length lenses are their size and weight as well as their maximum aperture or f/stop. Prime lenses tend to be more compact and lightweight than zoom lenses.Prime lenses also tend to have a larger maximum aperture (f/1.4 to f/2.8). This is an advantage when shooting in low light conditions as it will increase the possibility of hand holding the camera and freezing the subject without shake or blur caused by the longer exposures. Photographing using prime lenses with large apertures also means you can get a shallow depth of field which is useful for portraiture where you might want a softer or blurred background (also known as bokeh).


Coosing diffrent locations
I chosed to capture few pictures from outside using natural lights . when I do this I consider about the shutter speed, Apature value (AV) and ISO (International Standared Organization)
Portraight in natural light
Camera Used: Cannon EOS 500
Exposure:1/800
No Flash compulsory


Camera used :
Cannon EOS1100D


Using Artificial light- In studio
Natural Light- considering about Apature, Shutter speed and ISO
To take this picture I used cannon EOS 500D Camera. ISO was 100 and shutter speed (exposure time ) was 1/800 Seconds. 55mm was uased and no flash was compulsory.
Understanding Aperture – A Beginner’s Guide
Dec
19
2009
Before reading any further, I highly recommend reading about what a DSLR camera consists of.
.
2) Size of Aperture – Large vs Small Aperture
(image courtesy of Wikipedia):
The size of the circle represents the size of the lens aperture – the larger the f-number, the smaller the aperture.
3) Share this article:
Read more: http://photographylife.com/what-is-aperture-in-photography#ixzz34QvlDazp
The correct Exposure - a tutorial - Part 1: Shutter, Aperture and ISO
|
Determining the
"correct" exposure for an image can be a challenging task. We could choose to
simply let our camera decide for us, and use the fully automatic settings that
are quite sophisticated and often do a reasonably good job. However, this also
means to give away part of the creative process to your camera. I am writing
this tutorial with the beginning photographer in mind. The principles outlined
in this article should become a second nature to you. I encourage you to
practice and to ask questions. In many ways, this is like riding a bike. Once
you learned how, you can focus your attention on your surroundings.
I am not advocating using the manual settings of your camera at all times. Instead, I am a big fan of the creative zone settings such as aperture priority Mode, Shutter Priority Mode and Program mode. I use these automatic modes 95% of the time and I rarely resort to Manual Mode. Aperture settings determine the Depth of Field (how much of your scene is in focus). Landscape photographers often strive for a very large Depth of Field while Portraits often require a shallow Depth of Field. Being in control of the aperture, the photographer can direct attention and guide the viewer through the image. Shutter speed controls how motion of the subject or your camera will look like in your pictures. A slow shutter will blur fast moving subjects and a fast shutter will freeze them. The three exposure controls: Shutter Speed, Aperture, ISOIf all this sounds confusing and if you feel overwhelmed, you are in good company. There are too many degrees of freedom and too many choices to make, but you can become a master through practice.Technically, photography is nothing more than a method to capture light on your sensor or film. With exposure, the photographer is in control of the amount of light that reaches our sensor and of the sensor sensitivity (ISO). IUsing Shutter Speed, Aperture and ISO controls for ExposureNow that we understand ISO, Shutter Speed, and Aperture, we need to learn how to combine them to create an exposure. This is the most important thing to understand in photography and the reason I spent so much time creating the diagram. The combination of Shutter Speed, Aperture, and ISO as well as the focal length and focus point fully control how an image looks like. Any given brightness level, requires a certain sensitivity to capture it. In my diagram, I encoded the brightness levels of a scene with colors. A dark scene requires a sensitive camera system (slow shutter speed, wide-open aperture, and/or high ISO). A small f-stop number (e.g. f/2) corresponds to a wide-open aperture that is very bright. Lenses that open up to f/2 or wider are often quite expensive. The message to take away from this diagram is the possibility to trade off. For any given brightness, an increase in shutter speed (e.g. to freeze motion), requires a wider open aperture (less depth of field) or an increase in ISO speed if the aperture cannot be increased anymore. Trading off shutter speed for aperture is one of the basic rules. A small aperture (large Depth of Field) often requires a tripod, as the shutter speed decreases. Landscape photographers often work with tripods even during the day for exactly this reason. Increasing ISO is not an option, due to the added noise. On the other hand, a tripod is not always an option. I did many of my indoor shots of old missions with a higher ISO setting and a short focal length. The short focal length helps me to capture everything in the scene, but it also lets me shoot at slower speeds handheld without camera shake becoming a problem A very bright scene lets us shoot at small apertures (large f-stop) and still shoot handheld at fast shutter speeds. The diagram only shows a small portion of the shutter speed scale that ranges from 1/8000s to bulb (hours if necessary) for most SLR cameras. Polarizing filters reduce the brightness of up to two stops (depending on the rotation of the filter). Sometimes this is beneficial (blurring motion) but often it is an unwanted side effect to remember. The "Sunny 16 Rule"The light meter in your camera may fail or you might be in a hurry. Whatever the reason, sometimes it is good to know that at f/16 (an aperture with lots of depth) your exposure on a sunny day should be 1/(ISO Rating) to keep the highlights from clipping. If you have your camera set to ISO 100, this means your exposure should be 1/125 (the closest value to 100). One stop reduction in light due to a faster shutter (to 1/250) requires opening the aperture by one more stop (going to f/11 from f/16).In my next tutorial, I will show you how to play Shutter, Aperture and ISO against each other to control Depth of Field, Motion Blur and your inner artist. |
References
- http://photography.tutsplus.com/articles/10-steps-for-building-a-photography-portfolio-to-be-proud-of--photo-3991
- http://www.wikihow.com/Create-a-Photography-Portfolio
- http://www.aguntherphotography.com/tutorials/the-correct-exposure-part-1-shutter-aperture-iso.html
No comments:
Post a Comment